Friday, January 16, 2015

Maple Pancake Breakfast Sandwich recipe - Bacon, Egg and cheese on maple pancakes on the Euro-Q

 Super simple sandwich that I made just to play around with the new egg rings I received.  Plus this is the first video on my new to me Weber Genesis Silver that I picked up on craigslist for 40$.  I love the new grill...not sure how old this Weber is but it is a solid grill and will be used as my outdoor griddle.
Let me start by saying these sandwiches completely rocked.  I will be making many more versions of these.  Even with very little maple syrup the flavor really comes through in the pancakes.  The pancakes are so light and fluffy.  They make a perfect bun for a breakfast sandwich.
This sandwich I guess is kind of like a McGriddle....even though I have never had one I really cant speak to that.  I really hope you give this recipe a try!

To start off make your favorite pancake batter and preheat your griddle to a medium heat.  You do not want the griddle to hot as these pancake buns are thick and you want them to cook through.  Unless, you like gooey pancakes....but that is just not my thing.

Cook 1 strip of bacon per sandwich.  After the the bacon is cooked, wipe down the bacon grease and spray some cooking spray on some egg rings.  Place the egg rings on the griddle and let them heat up a little.

Fill the egg rings about 1/4 of the way up with batter and then drizzle in some maple syrup.  Top with more batter and cook for a few minutes.  Use a butter knife to loosen the pancakes from the egg rings, if necessary.  As you can see in the video one did not stick at all.  Flip the 'buns' and add another egg ring to the griddle to heat up for the egg.

When the pancakes are done, add 1 egg to the egg ring and break the yolk.  add about half a cup of water and close the grill to steam the egg (you could also use something to cover the egg if you are not cooking on a gas grill).  If done right the top of the egg will be partially cooked and its now time to flip and finish cooking the egg.

After you flip the egg place 1 piece of cheese on the top to melt a little.

Assemble the sandwich as shown in the pictures.

For each sandwich:
Pancake buns infused with maple syrup
1 piece of bacon
1 egg
1 slice of processed cheddar cheese


Tuesday, January 13, 2015

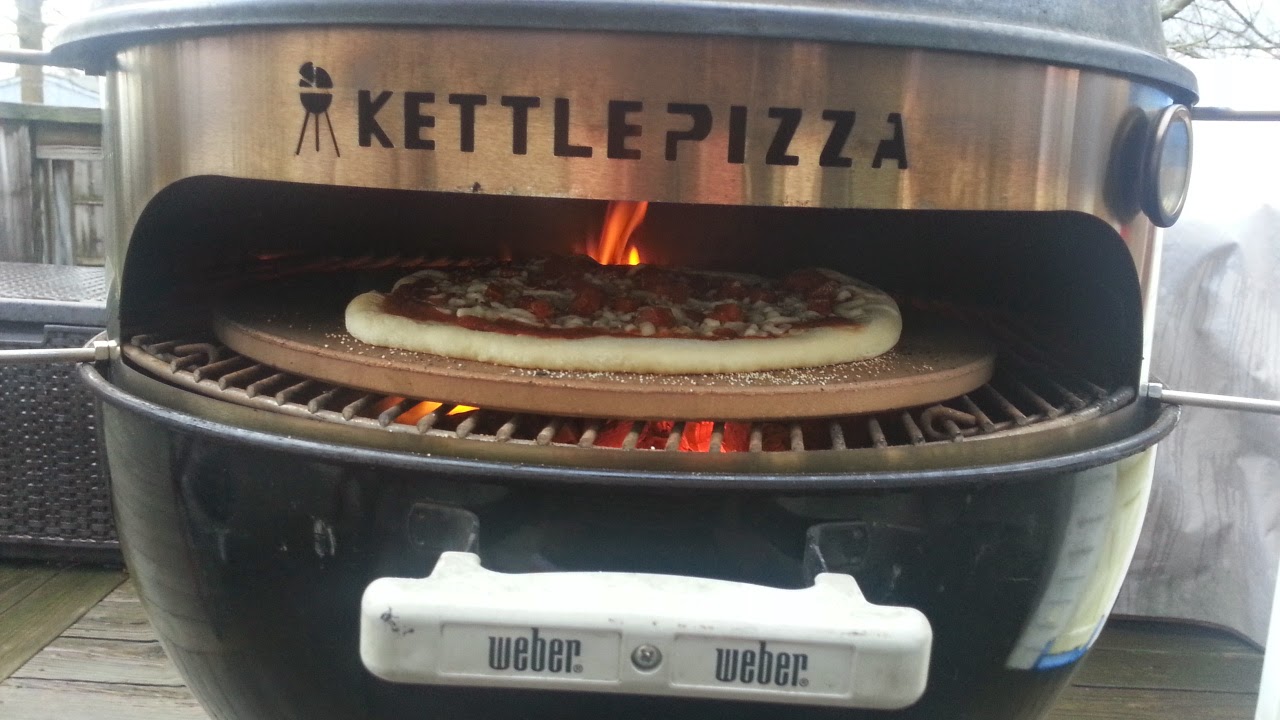
4 Wood-Fired Personal Pizzas cooked in 20 minutes (total time) on the Kettlepizza - How to cook on the Kettlepizza

Here is a quick video on how to use the Kettlepizza.  I cooked 2 pepperoni pizzas and 2 smoked sausage and diced peppers pizzas in 20 minutes total time.  I did not reload charcoal or hardwood during this cook.  This is an excellent way to cook pizzas on the grill.  


I fired up one mostly full chimney of Kingsford Blue, when ready dumped in a horseshoe banked around the back of the kettle.  I added 2 applewood logs and put the kettlePizza attachment in place.  I check on it 20 minutes later and it was perfect pizza temp.  
First pizza (sausage and peppers) went on at about 650 degrees and came out 3.5 minutes later at about 700+.  Second pizza went on at 700+ and was in that range for the whole pie...I probably took it off in 3 minutes.  These went really fast and I forgot to take notes.  
 The third pizza went on just under 700...I probably could have added one more piece of wood to spike the temp but really wanted to know how many pizzas I could cook on 1 load of charcoal and 2 pieces of wood.  I am guessing if I had all the dough rolled out and ready I could have gotten 5 pizzas done with the amount of fuel I used.  
The fourth pizza went on just under 600 and cooked in about 4-5 minutes.  All of the pizzas were excellent.  It really helps to have everything prepped ahead of time and 2 pizza peels is a must.  I would like to have an aluminum one as well.

Check out the video of this cook and enjoy!


Subscribe to my channel - http:// bit.ly/1DUlIs3


Wednesday, January 7, 2015

Kettlepizza Unboxing, Setup and Installation - How to install a Kettlepizza Deluxe

Here is a quick guide to installing the KettlePizza for the first time. 
When I shot this video I was very disappointed that all the pizza dough I had was frozen solid.  I managed to get some dough out and defrosted it for a night cook.  I cooked 3 or 4 pizzas....I cannot really remember exactly. 
I threw the first one in when the thermometer said 550 (I was kind of anxious) - it took about five-six minutes to cook.  Next one went in at 650 - this was was about four and a half minutes. 
The last 2 the thermometer read well over 700 and took in the 3.5 minute range...gotta watch it closely for the first few cooks before you get a handle on how fast they cook.
I cannot wait to cook Napoletana and Margherita pizzas on the Kettlepizza!  I plan on doing them and a video as soon as the weather isn't so bitter.  My next video is 4 pizzas on the Kettlepizza in 20 minutes. 


Tuesday, December 23, 2014

Pepperoni Garlic Knot Pull Apart Bread Recipe - How to make an easy game day recipe

 
I wanted to make just plain garlic knots when I saw a recipe over at serious eats.  I loosely based this recipe on that.....by that I mean I kind of winged it after I looked at the pictures.  I have made this since I filmed it and half of a pizza dough works better but this is only a two person serving.  I really hope you give this one a try! 
 

I started out with enough dough for one pizza and let it rise in the refridgerator over night. 

The next day I diced up some pepperoni and threw it in a cast iron pan (I used an 8'' - original recipe called for a 10'') with the olive oil and butter.  Simmer a bit and throw in the herbs and crushed red pepper, let that go for another minute or two and add the garlic.  Cook another minute and remove from heat to cool - I added it to a metal bowl so that the garlic would not burn. 

While the pepperoni oil is cooling go ahead and make the garlic knots.  Roll out the dough to press out any bubbles and cut in strips.  Tie strips in knots and toss in the pepperoni oil.  Add knots back into the cast iron and pour over any oil/pepperoni left in the bowl.  Top with freshly shredded cheese and cover.


Let rise for at least 2 hours.  I turned on the oven and when it reached 100 degrees, I turned it off and let the knots rise in there.

These could surely be cooked in the oven but I prefer the smokiness a charcoal grill brings.  After the knots double in size, preheat your grill/oven to 400 and cook for 20-25 minutes.  Add a some freshly grated cheese on top and serve with some warmed marinara sauce.

If you plan on serving this to more than two people I highly recommend making a double batch. 


1 pizza dough (14 oz)
Diced Pepperoni
3 T Olive Oil
1 T Butter
1/4 t Dried Parsley
1/4 t Dried Oregano
1/2 t Dried Italian Seasoning
1/4 t Crushed Red Pepper
2 cloves of garlic, crushed
Pecorino Romano

Here is the link to recipe over at serious eats - http://www.seriouseats.com/recipes/2014/09/easy-pull-apart-pepperoni-garlic-bread-recipe.html

Friday, December 12, 2014

Candied Jalapeno Apple BBQ Sauce

This sauce has everything... spiciness, sweetness, unique flavor and a nice tang!  I came up with this idea from watching a Smoky Ribs rib video.  The ribs looked so good I had to create an Candied Jalapeno BBQ sauce.  Here is my attempt.  It turned out really good and is excellent on pulled pork. 

As for the type of apples I used I am not really sure.  I know it was 3 different types (Gala, Ida Red and Crispin I think), 3 firm and slightly tart apples would be ideal.  I hope you give this BBQ sauce a try!


In a pot over medium heat add the oil, peppers and onions along with a big pinch of salt - cook until translucent.
 
Add the apples and brown sugar and cook until the apples soften a bit.

Add the candied jalapenos along with the brining liquid and all the other ingredients and bring to a simmer.  Cook for an hour, adding water if it seems too think.  Remember it will be much thicker after its blended and cooled. 

Let cool a bit and taste for seasoning - then blend.  Place a towel over the top blender if the sauce is still hot.  Pour into sterilized containers and store in the fridge or can the sauce.  

1 T Canola Oil
1/2 C Diced Green Bell Pepper
1 Diced Cooking Onion
1 Jalapeno
3 Cored/Cubed Apples
1 C Brown Sugar
1 C Jalapenos filled to the line with the brining liquid
20 oz Apple Cider
2 C Ketchup
1 C Mustard
1/4 C Molasses
1/3 C Worcestershire
1 C Cider Vinegar
2 t Fresh Cracked Pepper
1 1/2 t Salt


Tuesday, December 9, 2014

Christmas Breakfast Sausage - How to make a easy homemade breakfast sausage for Christmas morning

Sage and clementine zest really make this sausage!  Super easy recipe to make the best sausage patties in your life!  I hope you give these a try. 
 

Freshly ground sausage patties with no artificial ingredients like some of those store bought ones.  Homemade sausage patties are perfect for anytime!

This recipe is for about 3 lbs of pork shoulder.

Mix all the spices and herbs together.  Cube up the pork shoulder and mix in the seasoning mixture.  Place the pork on a baking sheet and put in freezer for 20-30 minutes to firm up just a little. 

Feed the pork into a meat grinder, alternating fatty and not so fatty pieces.   I used the small setting on the grinder. 

I recommend frying a couple patties up right away to taste for seasoning.  They might taste a little under seasoned but - remember that the real test is after it sits in the fridge for 24 hours! 

The bonus recipe - A sausage sandwich cooked on the Kettle-Q.  Bread toasted on one side with 2 fried eggs, 2 slices of 3 pepper jack cheese and 2 homemade sausage patties.

Chopped Fresh Herbs - Pineapple Sage and Thyme - regular sage will work just as well
Zest of 5 Clementines
3 T Fennel Seeds
2 t Salt
2 t Fresh Cracked Pepper
1/4 t Oregano
1/4 t Basil
1/4 t Parsley
1/8 - 1/4 t Crushed Red Pepper
pinch nutmeg

Tuesday, December 2, 2014

How to Grill a Pizza - How to cook the perfect pizza on a Weber grill (recipe)


This technique works in just about any temperature....it was snowing during most of the cook and 20 minutes later I had a perfectly cooked pizza.  This produces a much better pizza than those made in the oven (even on a pizza stone).  I hope you give this recipe a try.  


This technique has been tested many times on the 22.5 Weber Kettle grill but I am sure it will work on other sized kettle grills.

Light 1 full chimney of charcoal - when ashed over dump charcoal in grill and bank on one side of the grill in a 'C' pattern.  Leave lid off grill for about 5-10 minutes to let the charcoal light fully.  When the briquettes are fully lit add some lump charcoal on top of the briquettes and place the grill grate in with a grill extension on top.  Place the grill extension on the indirect side of the grill (not over the coals)  Place lid on grill and wait about 15 minutes to come up to temp.  I have reached 550-600 degrees Fahrenheit in the dome with this method.   While grill is coming up to temperature, stretch the pizza dough and top with desired toppings.

When the grill has reached place pizza on on grill extension and cook for 15 minutes.  Check the pizza and rotate 90 degrees and cook 5 minutes longer.

Times may differ because of ambient temperature/dome temperature, so play around with them.  This is the technique that I have found to work perfectly every time.


Put anything on the pizza you like but if you are interested, here is what I used:

Garlic that was slow roasted in olive oil
Crushed Red Pepper
Black Pepper
Baby Spinach
Peccorino Romano
Mozzarella Cheese
Homemade Italian Sausage, cooked
Dried Oregano

Hot sauce to dip!